


Understand in a flash!
How to adjust an indoor barometer
Just like the tide clock, the barometer requires specific handling to set it correctly.
Here, we detail how to adjust the barometer in 2 steps so you can start forecasting the day’s weather from your home.
⚠️ Use of this product is not recommended above 400 meters (about 1,300 feet) altitude due to atmospheric pressure variations that may affect its proper functioning.
Adjustment in 2 simple steps
Step 1
To calibrate your needle barometer, you first need to obtain an essential piece of information for setting the barometer: the atmospheric pressure (expressed in hectopascals - hPa).
Since this pressure varies depending on altitude and weather conditions, it is crucial to find the exact pressure for your location.
Check the atmospheric pressure in real time
Step 2: Adjustment
After noting the current atmospheric pressure for your location, you can now proceed to adjust the aneroid barometer.
You need to set the needle to the value corresponding to the measured pressure.
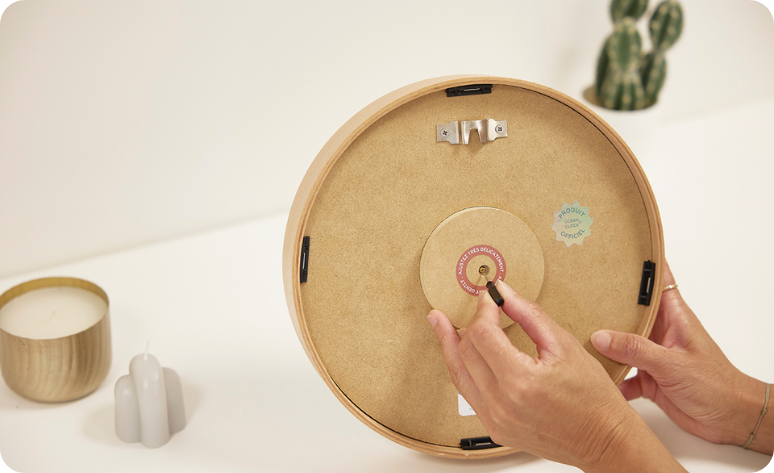
To do this, locate the adjustment screw on the back of the barometer and turn it VERY LIGHTLY while holding YOUR BAROMETER VERTICALLY (not flat) until the needle points to the desired scale reading.
Use the small screwdriver provided with your Ocean Clock barometer. Since the mechanism is very sensitive, we recommend turning the adjustment screw gently and tapping on the glass to free the needle. Repeat this process until you reach the correct value.
Once your barometer is calibrated, all that remains is to install it and consult it daily to forecast the weather for the next 12 to 24 hours.
🚫 Please be careful not to move the needle below 970 hPa or above 1050 hPa, as this may damage the mechanism.
Once you have calibrated your barometer, all that’s left to do is install it and check it daily to make your weather forecasts for the next 12 to 24 hours.
Recommendations
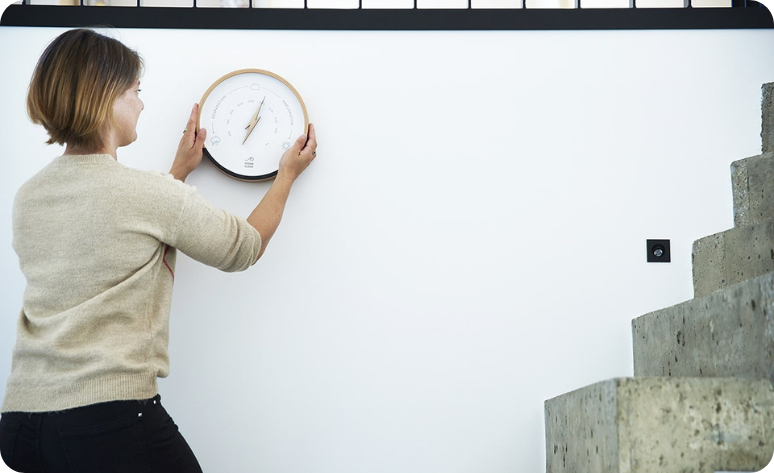
We recommend installing your barometer in a location free from extreme heat, rain, or strong winds, as these conditions can distort its readings and damage your wooden barometer over time. Avoid placing it outdoors or in areas with large temperature fluctuations, such as bathrooms or near heat sources like radiators.
Since the needle has a counterweight, it is essential to hang the barometer perfectly vertically to ensure accurate readings.
Once you’ve found the ideal spot, simply hang your beautiful decorative barometer on the wall using its hanging system.
⛰️ Reminder: Use of this product is not recommended above 400 meters (about 1,300 feet) altitude due to atmospheric pressure variations that may affect its proper functioning.
CHECK OUR FAQ
Having an issue with your product? If you’re experiencing a problem with one of our products, don’t worry! We invite you to check our FAQ, where you’ll find answers and solutions to the most common issues. This will help you resolve the situation quickly and easily. If needed, our team is, of course, available to assist you.


