


DIY Clay Coasters: Make Beach-Style Coasters at Home
In short: here is how to make beach-style coasters with self-hardening clay. Roll out the clay, cut it with a template, press in shells or draw a coral with string, let it harden for about 24 hours, then colour it in shades of blue with Posca markers or paint.
The essentials
| Step | What to do |
|---|---|
| Materials | Self-hardening clay, rolling pin, knife, paper or card, paint or Posca markers, shells or string |
| Shape | Prepare templates, roll out the clay, cut it out, remove the excess and smooth the edges |
| Decoration | Imprints of well-ridged shells, or a coral drawn with string |
| Drying | About 24 hours, depending on the clay |
| Colours | Shades of blue, with a Posca marker or a fine brush |
When barbecue and outdoor drinks season begins, we look forward to long evenings on the terrace, sipping a good cocktail with friends or family. Our team got stuck in, or rather got its hands in the clay, to offer you an easy DIY decor project: making original coasters that will take all your drinks to the water's edge. While the embers heat up, discover all our tips to make your own seaside-style table decor at home.
The toolkit for pretty ocean-inspired coasters
You need self-hardening clay, a rolling pin, a knife, paper or card, paint or Posca markers, and shells or string.
Eager to create? Patience, patience... Before we show you the different steps of this DIY, let us talk about the essential materials for making these original coasters. To start, you need:

Self-hardening clay
There are different types of clay: self-hardening clay and traditional clay, which has to be fired. To avoid any cracks during firing, we chose self-hardening clay, which needs about one day of rest to harden without altering the style of your creations.
A rolling pin, a knife, paper or card
The paper or card will be used to create your own templates, which give your coasters their shape in the second step of this DIY.
Paint or Posca markers
Posca markers are a good alternative to paint and allow better precision when colouring small details. If you use paint, we advise you to get a fine brush, to avoid any smudging.
Shells or string
These elements will help you decorate your coasters in a seaside spirit. Of course, you can adapt this list according to the style you want to give them.
Start by creating the shape of your 100% ocean coasters
Prepare templates, roll out the clay, cut it to the template, then smooth the edges by hand.
Before working the clay, choose the shape of your collection of handmade coasters and prepare templates in paper or card: round, asymmetrical, square, shell-shaped... Treat yourself and go for the shape you like.
Set your templates aside and let us get down to business! To shape your coasters, first cut the clay to the size you want. It is better to cut one piece of clay for one coaster at a time.

Next, knead your piece of clay to make it more supple. You can split the dough in two to warm it up faster. As soon as it feels pliable enough, take your rolling pin and roll out the clay to get the perfect size and thickness for your coasters.

To draw the shape of your coaster, take a knife and place the template on the rolled-out clay. Then cut by following the edges of your template.


To finish, remove the excess clay and smooth the edges of your coaster by hand. Repeat the operation for each coaster.
Drawing inspiration from the ocean to decorate your handmade coasters
Press in well-ridged shells or draw a coral with string, let dry for about 24 hours, then colour in shades of blue.
Shell and coral imprints
Is your little seaside decor ready to put on its finest attire? To give your coasters an original style, add small beach-inspired details, using shells or string.
Adorn your creations with pretty patterns using imprints of small shells. For a nicer result, choose well-ridged shells, which will give more relief to your creation. Do not hesitate to mix different types of shells for a truly original sea decor.


You can also use string to give them a seaside spirit, by drawing a coral. Start by drawing the structure of the coral, then add the little branches as you like.
Letting the clay dry
Then leave the clay to rest until it has completely hardened, about 24 hours. This time may vary depending on the clay you choose. You will need a little patience before you can add the finishing touches to your handmade table decor.
The colours: shades of blue
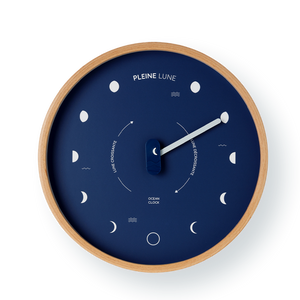
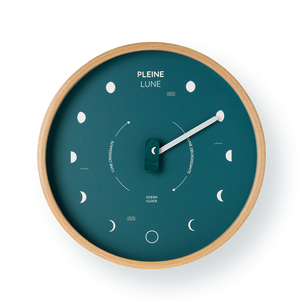
To colour your creations and give them character, take a Posca marker, or a fine brush and paint, in the colour of your choice. To create a seaside decoration, we chose to colour our coasters in shades of blue. Ideal shades to match your homemade coasters with a teal blue tide clock or a navy blue decorative object.


For our "coral" coaster, we chose to paint the string imprints to bring out the pretty silhouette of the coral.
For the coasters with shell imprints, we preferred to colour only the edges of the coaster to naturally highlight the shell prints. Of course, you are free to create and paint as you wish.

Decorate each of your coasters in a different way, or match them! When the paint is dry, you can gather your friends or family around a drink or a coffee in your garden, to enjoy the sunshine and the long days.

Now it is your turn to create! Which elements of the ocean will inspire your creativity and take your guests to the water's edge?
Did you like this decor DIY? Discover all our ocean-inspired decor and DIY ideas on our blog.
To match your blue coasters


Frequently asked questions
What materials do you need to make clay coasters?
Self-hardening clay, a rolling pin, a knife, paper or card for the templates, paint or Posca markers, and shells or string for the decoration.
Why choose self-hardening clay?
It avoids the possible cracks of traditional clay during firing and needs about one day of rest to harden, without altering the style of your creations.
How long does it take for the clay to harden?
About 24 hours, but this time may vary depending on the clay. Wait until it is completely hard before painting it.
How do you decorate coasters with shells or string?
Press well-ridged shells into the fresh clay to create relief, or draw a coral with string, then paint the imprints or only the edges.
Are self-hardening clay coasters water-resistant?
Self-hardening clay is not waterproof by nature: to protect your coasters from stains and moisture, apply a suitable varnish once the paint is dry.


