


DIY Ocean Candles: Make Blue Gradient Candles at Home
In short: here is how to make handmade candles in the colours of the ocean. Melt a taper candle cut into shavings in a water bath with a few pieces of blue and green wax crayons, then dip your candles several times in this coloured wax to get a pretty gradient.
The essentials
| Step | What to do |
|---|---|
| Materials | 4 or 5 taper candles, 3 wax crayons (light blue, dark blue, green), a metal cup or enamel pot, a knife |
| Prepare | Cut one candle into shavings and the crayons into small pieces |
| Melt | Melt the wax in a water bath, add crayon pieces until you reach the colour you want, stir well |
| Dip | Dip the taper candles in the blue wax, lower each time, for a gradient |
| Finishing | Place in a transparent container, with a piece of string or the name of your favourite beach |
When the ocean is far away, nothing stops you from bringing it closer: watching the dance of its waves and feeling the sand under your feet is already a little possible with an ocean-themed decor DIY. The Ocean Clock team has prepared a quick and simple DIY to keep your hands busy. Ready to make your own candles in the colours of the ocean?
The essential checklist for making your ocean candles
You need taper candles, 3 wax crayons, a heat-resistant container that is deep and narrow, and a knife.
Before starting a DIY, it is essential to check the materials you need, to avoid any surprises at the next step. For this seaside decor DIY, gather the following:

Taper candles
4 or 5 candles will do to create your sea decor object. Of course, you can adjust the number to suit your wishes.
3 wax crayons
For the crayons, we advise the following shades: light blue, dark blue and green, as a small reminder of the colours of the ocean. You can adapt the crayon colours to the shade you want for this candle DIY.
A metal cup or an enamel pot
To make this handmade decoration, you need a heat-resistant container that is deep and narrow enough to colour your candles.
A knife
Have you gathered everything you need for your beach decor? It is now time to get down to business.
Your own blue wax in a few steps with an easy decor DIY
Cut a candle and crayons into small pieces, then melt them together in a water bath while stirring.
Get out your knife and saucepan! This is not the time for a chat, but for a do-it-yourself sea-themed decoration. To create your ocean candles, follow these steps.

Cut the ingredients of this ocean DIY
To make this ocean-inspired decorative object, you first need to prepare the decoration of the candles. 1, 2, 3... Here is how!
First, you will have to sacrifice a taper candle. Cut one of the candles into flakes or small pieces. The shavings will be used to make the blue wax that colours your ocean candles.
Do the same with the wax crayons. Remember to cut them into small pieces to make the next step of making your seaside decoration easier. Be careful with the quantity of crayons you cut: only a few pieces are needed to colour the candles, so do not empty your child's pencil pot.

Melt everything for a homemade coloured wax
Are you bursting to know the next step of this ocean decor DIY? Turn on your hob. Here we go!
Remember all those little pieces you cut earlier? It is time to give them a little heat. Start by melting the wax of the cut candle. To do so, pour the candle shavings into the metal cup and heat them in a water bath.
When the candle has melted, gradually add a few pieces of crayon until you get the colour you want. Remember to stir the mixture well to obtain a smooth liquid. You can then take the mixture off the heat, taking every precaution to avoid burns. Hot wax should only be handled by adults, and never heated unattended.

Decorate your candles for a unique seaside interior
Dip the candles several times in the blue wax, lower each time, to get a gradient, then place them in a transparent container.
Now for the most fun part of this DIY: personalising the candles. Ready to turn simple candles into sea decor?
To make this transformation, you need to colour your candles. To do so, take a taper candle and gradually dip it in the blue wax you have prepared.
As the wax is still hot, be very careful not to burn yourself. If your container is too hot, we suggest wearing gloves. This will save you from waiting for it to cool down and for the wax to harden.
To get a pretty colour gradient on your candle, it is best to start by dipping half of the candle, then take it out. Then dip it again in the wax, but this time lower down.
You can repeat this step several times if you want many layers of gradient. All that is left is to do the same for each of the candles you want to customise.

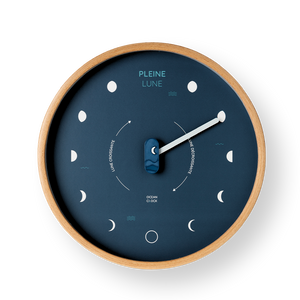
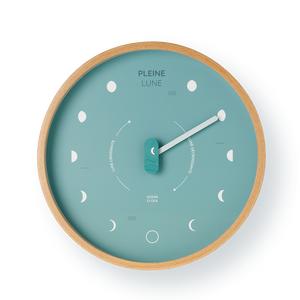
Now that your candles are in the colours of the ocean, find a place to install them to complete your decoration. Here, we chose to place them in a transparent container, to show off the pretty blue gradient. A piece of string, an inscription 100% ocean, and our homemade decoration brings a wave of colour into our interior. To create a delicate, warm seaside atmosphere, feel free to match the colour of your candle with an Arctic Blue tide clock or other turquoise-toned decorative objects.


Rope, sand, shells or the name of your favourite beach: let your creativity speak and decorate your candles as you wish!
For more 100% ocean DIYs, find all our handmade decoration ideas on our blog. On the programme: making decorative objects with seashells and creating a unique sea decor with sand.
Clocks in the blues of the ocean


Frequently asked questions
What materials do you need to make ocean-coloured candles?
4 or 5 taper candles, 3 wax crayons (light blue, dark blue and green), a metal cup or enamel pot that is heat-resistant, deep and narrow, and a knife.
How do you colour candles with wax crayons?
Cut a candle into shavings, melt them in a water bath, then gradually add a few pieces of wax crayon until you reach the colour you want, stirring to obtain a smooth liquid.
How do you get a blue gradient on a candle?
By first dipping half of the candle in the blue wax, then dipping it again, lower each time. You can repeat the operation several times for many layers of gradient.
What precautions should you take with hot wax?
Take the mixture off the heat carefully to avoid burns, wear gloves if the container is too hot, never heat the wax unattended and do not let children handle it.
How do you decorate your candles once they are finished?
By placing them in a transparent container to show off the gradient, with a piece of string, sand, shells or the name of your favourite beach.


